A. REGISTRY EDITOR
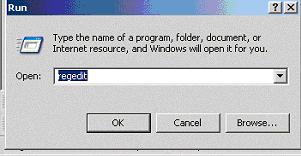
1. Run regedit

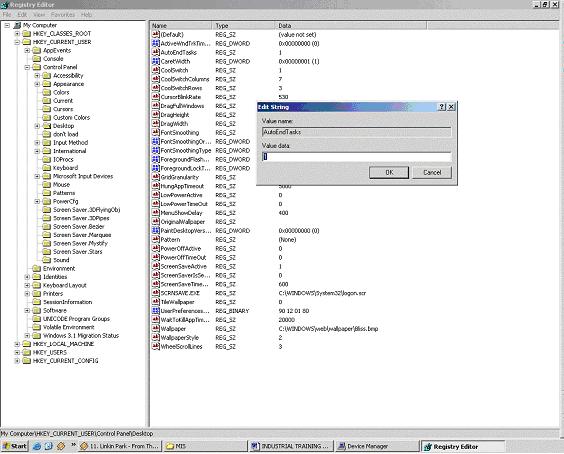
2. Registry editor shown as below will appear where we can change almost all software and windows setting. Registry editor work similar to control panel but it is bigger and more complicated. We can disable delay in most programs, which are quite fun to do and much more. The new changes will be applied on the next start.
 Example 1:
Here's a fix for slow printing issues for PCs with Windows XP, Service Pack 2 and Samba Print Queues installed.
The following can be deployed by using an SMS package with a file referencing the printers to remove.
Procedure:
1. Edit the registry observing usual caution.
2. Locate the key HKEY_CURRENT_USER\Printers\DevModePerUser
3. Remove all VALUES for Network printers of the form:
\'<'print_server_name'>''<'printer_queue_name'>'
4. Locate the key HKEY_CURRENT_USER\Printers\DevModes2
5. Remove all VALUES for Network printers of the form:
\ '<'print_server_name'>''<'printer_queue_name'>'
Method 2: Reset the Word Data Key in the Windows Registry
Warning If you use Registry Editor incorrectly, you may cause serious problems that may require you to reinstall your operating system. Microsoft cannot guarantee that you can solve problems that result from using Registry Editor incorrectly. Use Registry Editor at your own risk.
If Word is installed on your computer but was once running from the network, and there is a long delay when you open documents when not connected to the network, try the following procedure.
The Word Data key stores information that is specific to the printer that is installed. To remove this printer information from Word, rename or delete the Word Data key in the Windows registry. When you restart Microsoft Word, Word recreates the Word Data key automatically.
Note After you rename or delete the Word Data key, some settings in Microsoft Word are reset to their default settings.
To rename or delete the Word Data key in the Windows registry, follow these steps: 1. Quit all Windows programs.
2. Click Start and then click Run.
3. In the Open box, type Regedit and then click OK.
4. Open the following registry key:
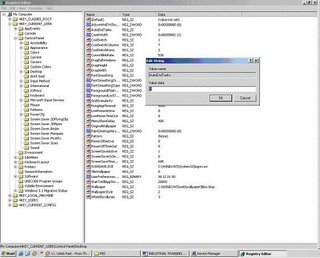
HKEY_CURRENT_USER\Software\Microsoft\Office\9.0\Word
5. Under the Word key, click the Data subkey.
6. On the Edit menu, click Rename or Delete.
7. Click Yes if the following message appears:
Are you sure you want to delete this key?
8. On the Registry menu, click Exit.
9. After you rename or delete the Word Data key, click Run on the Windows Start menu.
10. In the Open box, type Winword.exe /R /Y, and then click OK.
Example 2:
With Windows 2000 and Windows XP, all MS-DOS printing is done through the Windows NT spooler system. In order to know when to send a job to the spooler, there is a time-out on the printer port. Once something has been printed to the port, if this time out passes with no more data presented to the port, the print job is sent to the spooler. The default time out is 15 seconds. Therefore, there will be a 15 second delay before the print job starts printing.
Every computer using any version of Windows 2000 or Windows XP will need the changes described below. This includes the Windows 2000 data server. If using Citrix or terminal services, the changes must also be implemented on the Windows 2000 server running Citrix/Terminal Services, as well as each workstation that uses the Windows 2000 or XP operating system.
To decrease the time out use the steps below to edit the registry setting:
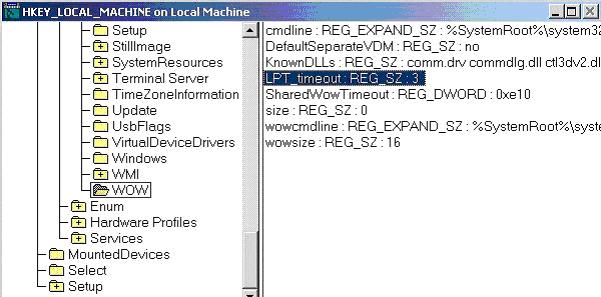
HKEY_LOCAL_MACHINESYSTEM CurrentControlSetControlWOWLPT_Timeout
WARNING: Using REGEDT32 can cause serious damage to your operating system. Make sure to follow these steps exactly.
1. On the Windows 2000 or Windows XP machine where the printer is connected, click Start -> Run and type REGEDT32
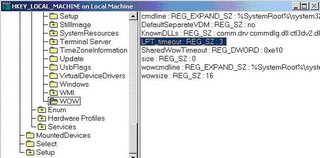
2. Bring up HKEY_LOCAL_MACHINE on Local Machine
3. In the header, click View and make sure to check "Tree and data"
4. In the left hand pane, expand System -> CurrentControlSet -> Control -> WOW
5. In the right pane should be a key "LPT_timeout". Double click this key
6. A prompt for a string with a default of "15" (seconds) will appear. Change this to 3 and click OK. The screen should appear as below.
7. Close RegEDT32
8. Start RDP and test to see if the local printer now prints faster by using the F2-Print function from the RDP Menu.
9. Repeat these steps for every computer running any version of Windows 2000 or Windows XP, including the data server, Citrix/Terminal Server, and all remote workstations connected via Citrix/Terminal Services.